Customize Navigation Menu
The navigation menu is available in two versions, namely main navigation and boostrap offcanvas style navigation.
- Open the Blogger HTML editor
- Look for the Header1 widget
Main Navigation Menu
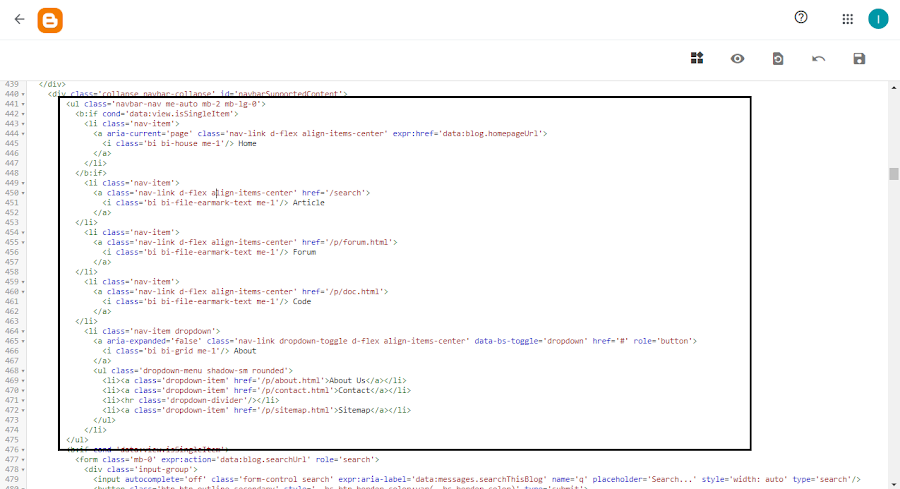
At the bottom of the navigation widget you will find code like below
<!--[ Menu Navigation ]-->
<ul class='navbar-nav me-auto mb-2 mb-lg-0'>
 <li class='nav-item'>
  <a class='nav-link d-flex align-items-center' href='#'>
   <i class='bi bi-file-earmark-text me-1'/> Article
  </a>
 </li>
 ....
</ul>
information
- change the href='#' attribute with your destination link
- Replace the word/sentence with your new title
- Replace the following class bi-file-earmark-text with the bootstrap icon code

Menu OffCanva (Edit via Blogger layout)
If you want to add lots of menus to your navigation, you can use the offcanvas menu so it doesn't look cluttered on the main navigation menu.
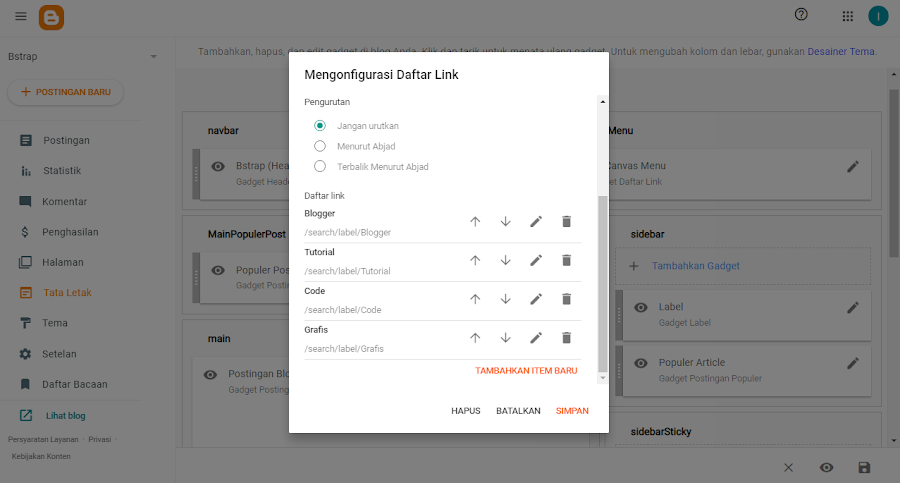
To add it, you can add it through the layout.
Steps ad Menu
- On the blogger dasbhoard, click Layout
- Find a widget named OffCanvasMenu, and click edit
- Then add a menu
- Click Save when finished

Faq:
This template icon uses the bootstrap icon. Example code like this <i class='bi bi-three-dots-vertical'/>. You can change the icon code according to your icon.
Enregistrer un commentaire:
2 Komentar